


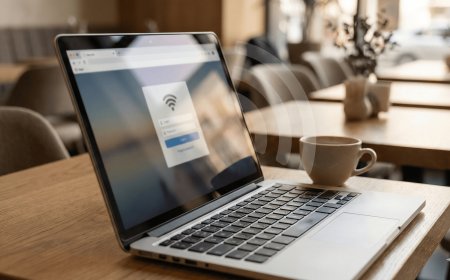

How to Create MikroTik Hotspot User Profiles for WiFi Packages
Learn how MikroTik hotspot user profiles work and how to create WiFi packages with time limits, speed limits, shared users, and voucher control.
How to Create MikroTik Hotspot User Profiles for WiFi Packages
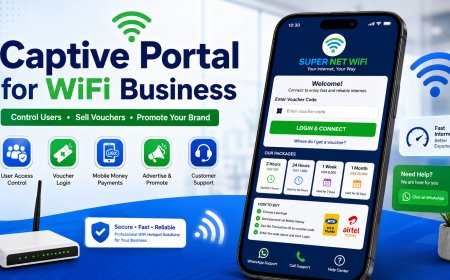
MikroTik user profiles are very important in a WiFi hotspot business. They help you control what each voucher can do. Without user profiles, it becomes difficult to create different packages such as 2 hours, 24 hours, weekly, and monthly plans.
A user profile can control speed, session time, shared users, rate limits, and other settings. This makes it easier to manage customers and protect your bandwidth.
In this guide, we shall explain what MikroTik hotspot user profiles are and how to use them for WiFi packages.
1. What Is a MikroTik User Profile?
A MikroTik user profile is a group of settings applied to a hotspot user. When you create a voucher user, you assign it to a profile. The profile then controls how that user behaves on the network.
For example, you can create a profile called 24HOURS. Any voucher added to this profile can be given 24-hour access with a specific speed limit.
2. Why User Profiles Are Important
User profiles help you separate your WiFi packages. A 2-hour user should not have the same rules as a monthly user.
Profiles help you control:
- Speed limit
- Session time
- Number of devices
- Idle timeout
- Keepalive timeout
- Package behavior
This makes your hotspot business more organized.
3. Example WiFi Package Profiles
Here is an example of simple WiFi packages you can create using MikroTik profiles.
| Profile Name | Validity | Speed | Devices |
|---|---|---|---|
| 2HOURS | 2 hours | 5 Mbps | 1 |
| 24HOURS | 24 hours | 7 Mbps | 1 |
| WEEKLY | 7 days | 10 Mbps | 1 |
| MONTHLY | 30 days | 15 Mbps | 1 |
You can adjust these speeds depending on your internet capacity and number of users.
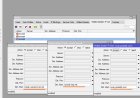
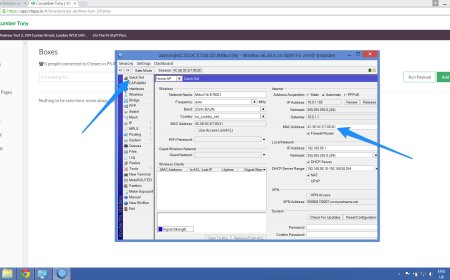
4. How to Open User Profiles in WinBox
To create or edit hotspot user profiles in WinBox, go to:
IP > Hotspot > User ProfilesFrom there, you can add a new profile or edit an existing one.
5. Naming Your Profiles Properly
Use simple names that are easy to understand. Avoid confusing names that you may forget later.
Good examples:
- 2HOURS
- 24HOURS
- 3DAYS
- WEEKLY
- MONTHLY
- FAMILY2DEVICES
Clear profile names make it easier to manage vouchers and avoid mistakes.
6. Setting Speed Limits
Speed limits help prevent heavy users from consuming all the bandwidth. In MikroTik, this is usually done using the rate limit field.
Example rate limit:
5M/5MThis means 5 Mbps upload and 5 Mbps download.
You can use different speeds for different profiles.
| Profile | Rate Limit |
|---|---|
| 2HOURS | 5M/5M |
| 24HOURS | 7M/7M |
| WEEKLY | 10M/10M |
| MONTHLY | 15M/15M |
7. Setting Device Limits
Device limits help stop customers from sharing one voucher with many devices.
In MikroTik, this can be controlled using the shared users setting.
Example:
Shared Users: 1This means one voucher can only be used on one device at a time.
For family or group packages, you can allow more devices.
| Package | Shared Users |
|---|---|
| Normal Voucher | 1 |
| Family Pack | 2 |
| Group Pack | 3 |
8. Setting Session Timeout
Session timeout controls how long a user can stay connected during one session. This is useful for time-based packages.
Example:
Session Timeout: 2hThis can be used for a 2-hour package.
For longer packages, you can set longer time limits depending on your setup.
9. Idle Timeout
Idle timeout disconnects a user when they are inactive for a certain time.
This helps clean inactive sessions from the hotspot system.
Example:
Idle Timeout: 5mThis means if the user is inactive for 5 minutes, MikroTik can disconnect the session.
10. Keepalive Timeout
Keepalive timeout helps MikroTik check whether a user is still connected. If the device disappears from the network, MikroTik can remove the session.
This is useful when users move away, switch off phones, or disconnect from WiFi.
11. Matching Profiles With Prices
Your user profiles should match your package pricing.
| Profile | Customer Price | Purpose |
|---|---|---|
| 2HOURS | UGX 500 | Quick browsing |
| 24HOURS | UGX 1,000 | Daily browsing |
| WEEKLY | UGX 6,000 | Regular customers |
| MONTHLY | UGX 25,000 | Heavy users |
When pricing and profiles match, it becomes easier to sell and manage vouchers.
12. Common Profile Mistakes
Many beginners make mistakes when creating user profiles.
Avoid these mistakes:
- Creating profiles without speed limits
- Allowing too many shared users
- Using confusing profile names
- Giving small packages too much speed
- Forgetting to test the profile
- Creating too many packages at the beginning
Simple and clear profiles are easier to manage.
13. Test Each Profile
After creating a user profile, test it before selling vouchers.
Check:
- Does the voucher login work?
- Is the speed limit applied?
- Is the device limit working?
- Does the session behave correctly?
- Does the user disconnect after expiry?
Testing helps prevent customer complaints.
14. Best Beginner Profile Setup
For a beginner hotspot, you can start with four simple profiles.
| Profile | Price | Speed | Devices |
|---|---|---|---|
| 2HOURS | UGX 500 | 5 Mbps | 1 |
| 24HOURS | UGX 1,000 | 7 Mbps | 1 |
| WEEKLY | UGX 6,000 | 10 Mbps | 1 |
| MONTHLY | UGX 25,000 | 15 Mbps | 1 |
This setup is simple and easy for customers to understand.
15. Conclusion
MikroTik user profiles are the foundation of your WiFi packages. They help you control speed, time, and device limits for each voucher.
A good hotspot business should have clear profiles that match the packages customers buy. Start with simple profiles, test them properly, and adjust as your business grows.
When user profiles are configured well, your network becomes easier to manage and customers get a better experience.
What's Your Reaction?
 Like
0
Like
0
 Dislike
0
Dislike
0
 Love
0
Love
0
 Funny
0
Funny
0
 Angry
0
Angry
0
 Sad
0
Sad
0
 Wow
0
Wow
0