


MikroTik Hotspot Setup Guide for Beginners: How to Create a Voucher-Based WiFi Business
Learn how MikroTik hotspot setup works for a voucher-based WiFi business. Understand routers, login pages, vouchers, user profiles, speed limits, and customer access.

MikroTik Hotspot Setup Guide for Beginners: How to Create a Voucher-Based WiFi Business
If you want to start a WiFi hotspot business, one of the most important devices you need is a MikroTik router. MikroTik is popular among hotspot business owners because it allows you to control users, create vouchers, limit speeds, manage time, and protect your internet from unauthorized access.
A hotspot business is not just about sharing WiFi. Without proper control, people may connect for free, one customer may share internet with many devices, or heavy users may slow down the whole network. MikroTik helps you manage all this from one place.
In this guide, we shall explain how MikroTik hotspot setup works from start to finish in a simple beginner-friendly way.
1. What Is a MikroTik Hotspot?
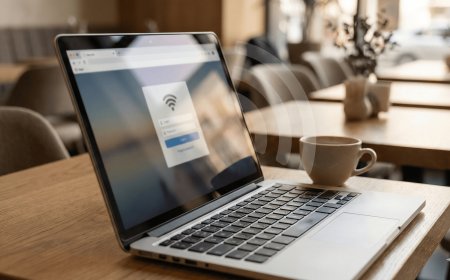
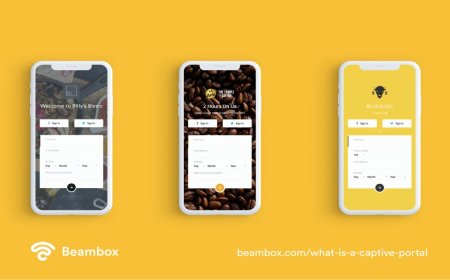
A MikroTik hotspot is a system that controls how users access your WiFi internet. When a customer connects to your WiFi, they do not get full internet immediately. Instead, they are redirected to a login page.
On that login page, the customer enters a username and password or a voucher code. If the voucher is correct and active, MikroTik allows the customer to access the internet.
This is the same system many WiFi businesses use to sell internet packages.
For example, a customer can buy:
| Package | Price |
|---|---|
| 2 Hours | UGX 500 |
| 24 Hours | UGX 1,000 |
| 1 Week | UGX 6,000 |
| 1 Month | UGX 25,000 |
After buying, the customer receives a voucher code, enters it on the hotspot login page, and starts browsing.
2. Why MikroTik Is Good for Hotspot Business
MikroTik is useful because it gives you control over your internet business.
With MikroTik, you can:
- Create voucher codes
- Set expiry time
- Limit user speed
- Control number of devices
- Block unpaid users
- Monitor connected users
- Disconnect users
- Create different packages
- Customize the login page
- Manage bandwidth
- Add trial access
- Redirect users after login
This makes MikroTik a strong tool for people who want to sell WiFi professionally.
Without MikroTik or another hotspot controller, it becomes difficult to know who is using your internet, how long they should use it, and how much speed they should get.
3. Basic Equipment Needed
Before setting up MikroTik hotspot, you need some basic equipment.
1. Internet From ISP
You need internet from an ISP. This can be fiber, wireless internet, or any reliable connection. The ISP will normally give you a router or connection device.
Your internet speed depends on your budget and the number of users you want to serve.
For a small hotspot, you can start with 20 Mbps to 50 Mbps. For a bigger hotspot, 100 Mbps or more is better.
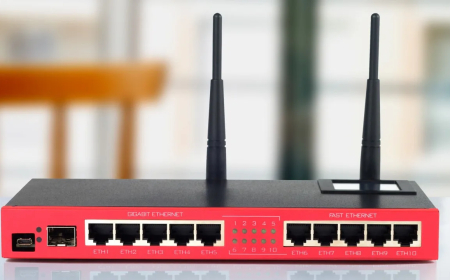
2. MikroTik Router
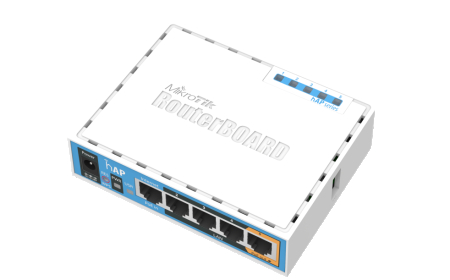
The MikroTik router is the brain of your hotspot system. It controls users, vouchers, speeds, and login access.
Beginner routers can include:
| MikroTik Router | Good For |
|---|---|
| MikroTik hEX / RB750Gr3 | Small to medium hotspot |
| MikroTik RB3011 | Medium to bigger hotspot |
| MikroTik CCR series | Large hotspot networks |
For beginners, RB750Gr3 or RB3011 can be a good starting point depending on your number of users.
3. Access Points
Access points are used to spread WiFi signal to customers. MikroTik controls the users, but access points provide the wireless coverage.
You can use indoor access points for homes and shops, and outdoor access points for wider areas.
Common brands include:
- TP-Link
- Ruijie
- H3C
- MikroTik
- Ubiquiti
4. Cables and Power Backup
You need good Ethernet cables, adapters, and sometimes a UPS or battery backup. Power interruptions can disconnect users and reduce customer trust.
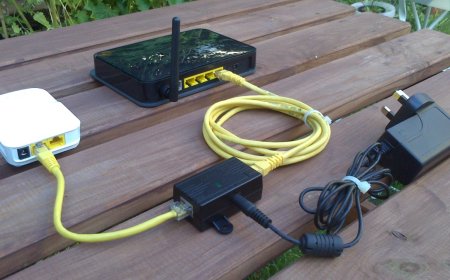
4. Basic Hotspot Network Layout
A simple hotspot network can look like this:
ISP Internet
     ↓
ISP Router or Modem
     ↓
MikroTik Router
     ↓
Switch
     ↓
Access Points
     ↓
Customers connect by WiFi
The MikroTik router should sit between the ISP internet and the customers. This allows it to control all users before they access the internet.
If customers connect directly to the ISP router without passing through MikroTik, MikroTik cannot control them.
5. Important MikroTik Terms Beginners Should Know
Before setting up hotspot, it is good to understand some common MikroTik terms.
Hotspot Server
This is the service that controls the login page and user access.
User
This is the voucher or account a customer uses to login.
User Profile
This controls the package settings, such as speed, session time, and device limit.
IP Pool
This is the group of IP addresses MikroTik gives to connected customers.
DHCP Server
This automatically gives IP addresses to customer devices.
Queue
This controls user speed and bandwidth.
Walled Garden
This allows some websites or payment pages to open even before the customer logs in.
NAT
This allows customers to access the internet through your MikroTik router.
Understanding these terms helps you manage your hotspot better.
6. Step 1: Connect the MikroTik Router
The first step is to connect your MikroTik router properly.
Usually:
-
Ether1 connects to the ISP internet
-
Ether2, Ether3, or other ports connect to your access points or switch
Example:
Ether1 = WAN / Internet from ISP
Ether2 = LAN / Customers
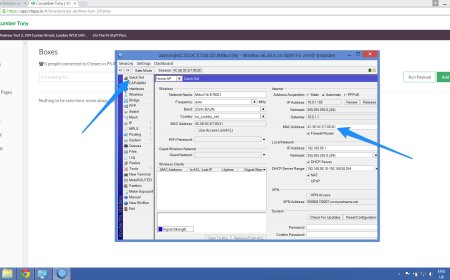
After connecting the cables, open WinBox on your computer. WinBox is the common software used to configure MikroTik routers.
Login to the MikroTik router using its IP address or MAC address.
7. Step 2: Set Up Internet on MikroTik
Before creating hotspot, make sure the MikroTik itself has internet.
You need to configure the WAN side depending on how your ISP gives internet.
Your ISP may use:
- DHCP
- Static IP
- PPPoE
If your ISP gives internet automatically, you can use DHCP Client on Ether1.
If your ISP gives a static IP, you must enter the IP address, gateway, and DNS manually.
If your ISP uses PPPoE, you must enter the username and password given by the ISP.
After setup, test if MikroTik has internet by using ping.
Example:
ping 8.8.8.8
If it replies, the MikroTik has internet.
8. Step 3: Create LAN Network for Customers
The LAN side is where your customers connect.
You need to create an IP address for the customer side, for example:
192.168.10.1/24
This means your customers can receive IP addresses like:
192.168.10.2

192.168.10.3

192.168.10.4
You also need a DHCP server so customers receive IP addresses automatically when they connect.
Without DHCP, many customers may connect to WiFi but fail to get internet.
9. Step 4: Add NAT for Internet Access
NAT allows devices on your customer network to access the internet through the MikroTik.
Without NAT, customers may receive IP addresses but fail to browse.
The common NAT rule is masquerade.
In simple words, masquerade allows many customer devices to share one internet connection.
10. Step 5: Run Hotspot Setup
After internet, LAN, DHCP, and NAT are working, you can now run the MikroTik Hotspot Setup.
In WinBox, this is usually found under:
IP > Hotspot > Hotspot Setup
During setup, MikroTik will ask you to select the hotspot interface. This is usually the LAN side where customers connect.
Example:
Hotspot Interface: Ether2 or Bridge-LAN
MikroTik will also ask for address pool, DNS name, and certificate options. For beginners, you can use simple settings first and improve later.
A DNS name can be something like:
login.supernet.local
or
wifi.login
After setup, MikroTik creates the hotspot server.
11. Step 6: Create User Profiles
User profiles are very important because they define the package rules.
For example, you can create profiles like:
| Profile Name | Time | Speed |
|---|---|---|
| 2HOURS | 2 hours | 5 Mbps |
| 24HOURS | 24 hours | 7 Mbps |
| WEEKLY | 7 days | 10 Mbps |
| MONTHLY | 30 days | 15 Mbps |
Each profile can have different settings depending on your business.
A 2-hour customer should not have the same time as a monthly customer. A weekly customer may also deserve better speed than a short-time customer.
12. Step 7: Create Voucher Users
After creating user profiles, you can create voucher users.
A voucher can be a username and password or only one code used as both username and password.
Example:
Username: T123456
Password: T123456
Profile: 24HOURS
When the customer enters the code, MikroTik checks if it exists and which profile it belongs to.
If the voucher is valid, the customer gets access based on that profile.
For easier management, many hotspot owners use voucher systems like Mikhmon or custom billing systems to generate many vouchers at once.
13. Step 8: Customize the Login Page
The login page is the face of your WiFi business. It should look professional and easy to use.
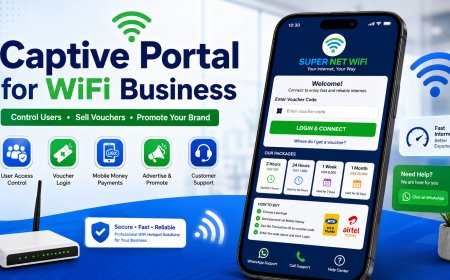
A good hotspot login page should include:
- Business logo
- WiFi name
- Package prices
- Voucher input box
- Login button
- Payment instructions
- WhatsApp support number
- Help button
- Terms of use
- Short message for customers
Example login page message:
Welcome to SUPER NET WiFi.
Your voucher code is the Transaction ID in the payment message you received.
Enter that code and click Login to access the internet.
This helps customers understand what to do without calling you every time.
14. Step 9: Add Payment Instructions
Payment instructions should be clear.
Example:
How to Buy WiFi
1. Choose your package.
2. Send payment to 07XXXXXXXX.
3. Use the Transaction ID as your voucher code.
4. Enter the code and click Login.
If you use mobile money or Flutterwave, you can tell users exactly how they will receive or use the code.
The simpler your instructions are, the fewer support calls you will receive.
15. Step 10: Test the Hotspot
Before customers start using the hotspot, test everything yourself.
Use your phone and connect to the WiFi.
Check the following:
| Test | What to Confirm |
|---|---|
| WiFi connection | Phone connects successfully |
| Login page | Opens automatically |
| Voucher code | Logs in correctly |
| Internet | Browsing works after login |
| Speed limit | Correct speed is applied |
| Expiry | Voucher expires properly |
| Logout | User can logout if needed |
| Reconnect | User can reconnect without issues |
Testing is very important because customers may lose trust if the system fails during launch.
16. Step 11: Monitor Active Users
After launching, you should monitor your users.
In MikroTik, you can check active hotspot users and see who is online.
You can monitor:
- Active users
- Data usage
- Login time
- IP addresses
- MAC addresses
- Session time
- Heavy users
This helps you know how your network is performing.
If one user is consuming too much bandwidth, speed limits and queues can help control usage.
17. Step 12: Manage Customer Complaints
Every hotspot business will receive customer complaints. The most important thing is to respond quickly and professionally.
Common complaints include:
Login Page Not Opening
Tell the customer to open a browser and visit any website. You can also give them a direct login address.
Voucher Code Not Working
Check if the code is correct, expired, or already used.
Slow Internet
Check if the customer has weak WiFi signal, many users are online, or the ISP connection is slow.
Connected Without Internet
Check DHCP, hotspot status, NAT, and internet from ISP.
Voucher Expired Too Early
Check the user profile time limit and session settings.
Good support keeps customers loyal.
18. Important Security Tips
Security is very important in a hotspot business.
Do not use default MikroTik login details. Change the admin username and password.
Use a strong password with letters, numbers, and symbols.
Do not give router access to everyone.
Disable unused services if you do not need them.
Back up your MikroTik configuration regularly.
Use different accounts for staff if needed.
Keep your router in a safe place where customers cannot reset or disconnect it.
19. Common Mistakes Beginners Make
Many beginners make mistakes when setting up MikroTik hotspot.
One common mistake is connecting customers before MikroTik. If customers connect directly to the ISP router, they can bypass the hotspot.
Another mistake is not setting speed limits. This can make the internet slow when many users connect.
Another mistake is using weak access points. Even if the internet is good, weak WiFi signal will make customers complain.
Another mistake is creating too many packages at the beginning. Too many options can confuse customers.
Another mistake is not testing vouchers before selling them.
Avoiding these mistakes can save you time and money.
20. Example Beginner Hotspot Plan
Here is a simple plan for a beginner WiFi hotspot business.
Equipment
| Item | Purpose |
|---|---|
| ISP Internet | Main internet connection |
| MikroTik RB750Gr3 or RB3011 | Hotspot control |
| Outdoor Access Point | WiFi coverage |
| Switch | Connect multiple access points |
| UPS | Backup power |
| Ethernet Cable | Network connection |
Packages
| Package | Price | Speed |
|---|---|---|
| 2 Hours | UGX 500 | 5 Mbps |
| 24 Hours | UGX 1,000 | 7 Mbps |
| 1 Week | UGX 6,000 | 10 Mbps |
| 1 Month | UGX 25,000 | 15 Mbps |
Customer Flow
Customer connects to WiFi
↓
Login page opens
↓
Customer buys voucher
↓
Customer enters voucher code
↓
MikroTik allows internet access
↓
Voucher expires after selected time
This is a simple but professional way to start.
21. How to Grow After Setup
After your MikroTik hotspot is working well, you can improve it step by step.
You can add more access points to cover more customers.
You can add agents to sell vouchers in different places.
You can create a better login page with images, packages, and payment buttons.
You can add online payments so customers buy automatically.
You can add WhatsApp support buttons.
You can create customer guides for phones, TVs, and laptops.
You can add advertisements on your login page to earn more value from traffic.
Growth should be done carefully. First make sure the network is stable, then expand.
22. Conclusion
MikroTik hotspot setup is one of the best ways to control and sell WiFi internet using vouchers. It helps you manage customers, create packages, limit speeds, control time, and protect your internet from unpaid use.
For beginners, the most important things are simple: connect internet properly, create a customer network, enable hotspot, create user profiles, generate vouchers, customize the login page, and test everything before selling.
A successful hotspot business depends on stable internet, strong WiFi coverage, fair pricing, good customer support, and proper MikroTik management.
With the right setup, MikroTik can help you turn your internet connection into a profitable WiFi voucher business.
What's Your Reaction?
 Like
0
Like
0
 Dislike
0
Dislike
0
 Love
0
Love
0
 Funny
0
Funny
0
 Angry
0
Angry
0
 Sad
0
Sad
0
 Wow
0
Wow
0